April 11, 2022 | Tags: #React.js, #Tailwindcss,
Dynamic Gradient Generator Built using React.js
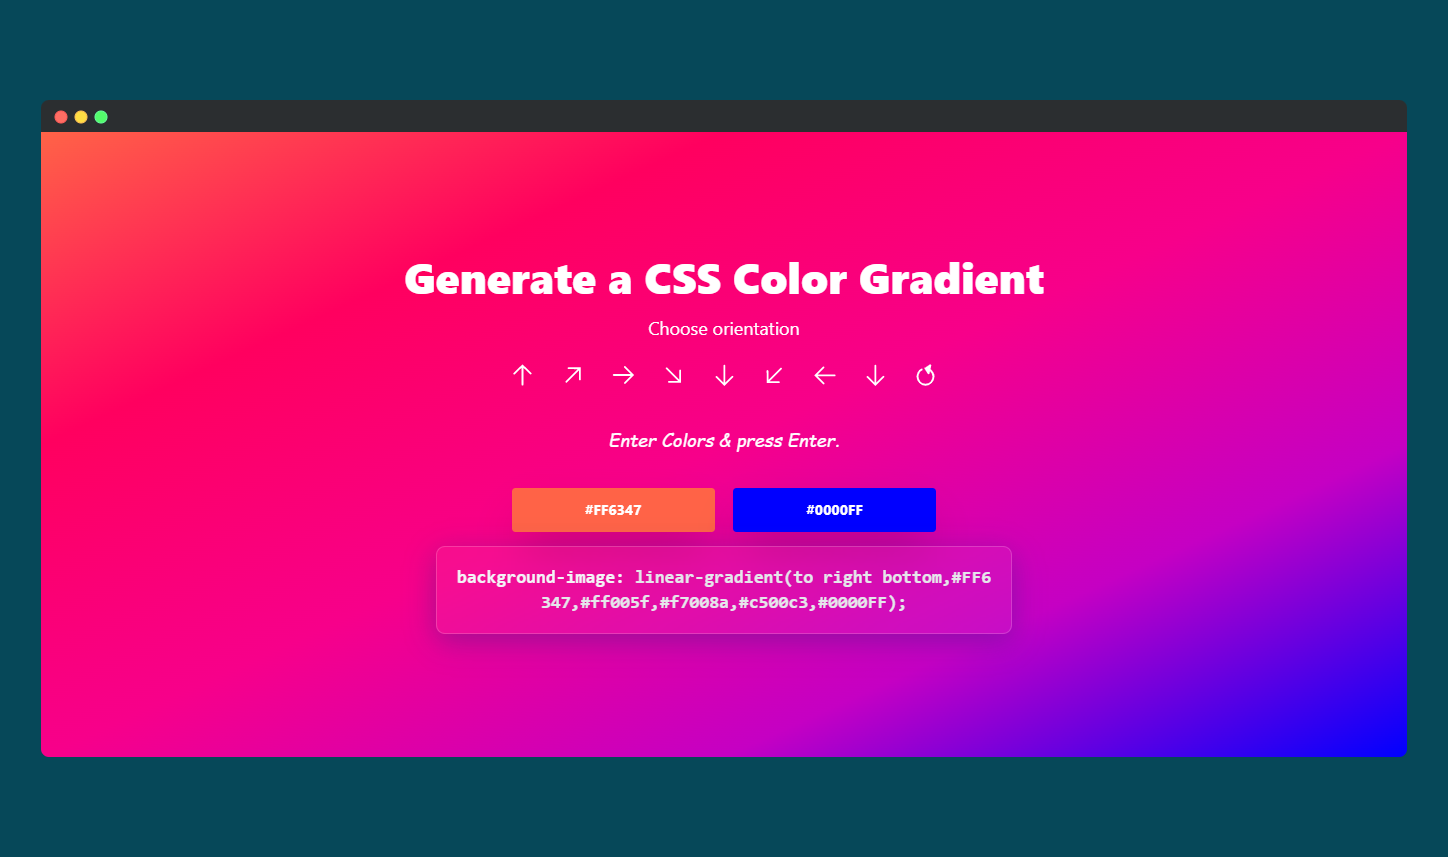
The web app generates dynamic gradients. You can change direction of the colors.
Sahil Patel
Full Stack Developer, UI / UX Designer , and lifelong learner.
Sahil Patel
Full Stack Developer, UI / UX Designer , and lifelong learner.
Recent Posts
9 days in Appwrite Hackathon - My Progress
Here, in this post it is all about the progress I have made since the start of the hackathon.
Read more.Deploy Appwrite using docker on Gitpod & Azure
A tutorial on how to deploy appwrite on Gitpod and Azure cloud. Learn to deploy appwrite on cloud.
Read more.Dynamic Gradient Generator Built using React.js
The web app generates dynamic gradients. You can change direction of the colors.
Read more.
A gradient generator seems fun. I do mostly use mycolor.space website to generate gradient in different formats. In the weekend I decided to make my own gradient generator and I have made a similar clone of mycolor.space. Take a look at the demo here.
You can find the source code of the project here and the live demo here.
The Gradient generator has options for changing the direction and the colors. It takes to parameters of colors and generates 3 most related colors between them.
Get The Environment Ready
First of all, create a react app using create-react-app and add support for tailwindcss.
npx create-react-app color-generator-react
cd color-generator-react
Now, cd into the project, add the only dependency which is Chroma-js.
yarn add chroma-js
OR
npm install chroma-js
Add TailwindCSS
yarn add -D tailwindcss postcss autoprefixer
OR
npm install -D tailwindcss postcss autoprefixer
The code below creates a tailwindcss.config.js file. As we have passed the -p flag, it also creates a postcss.config.js file with default config to use with tailwindcss.
npx tailwindcss init -pNow, let us create a tailwind.css file in the assets folder.
mkdir assets
cd assets
touch tailwind.css // Linux
OR
echo. > tailwind.css // Windows
In the created tailwind.css file, add the below tailwindcss directives.
@tailwind base;
@tailwind components;
@tailwind utilities;
Congrats, Tailwindcss is successfully added to the project.
Once the tailwindcss is added we can go ahead and start working on the project. But before that, let us have a little introduction of chroma-js.
Introduction to Chroma-js
Chroma-js is just an amazing piece of software when it comes to color manipulation, conversion and scaling. It has everything you need for every sort of manipulation from darkening or brightening to hue manipulation. It also gives you results in different color spaces. It can read, convert, analyze and manipulate colors from and to different formats.
We are going to use Chroma-js to generate 3 more colors from the actual given 2 parameters and create a gradient of 5 colors.
Let us Build the Layout
There is only single main component for the sake of simplicity. The markup below makes anything between the div to be centered using the flexbox properties.
    <div className="flex items-center bg-gray-900 justify-center md:fixed h-screen inset-0 px-10">
    /* All the content is centered. */
    </div>
To create the controls to change the direction of the color spread, add the below code in to the App.js file.
          <div className="flex items-center justify-center p-2 gap-2 flex-wrap md:gap-5">

              <button title="to top" onClick={() => changeOrientation("to top") }>
              <img src={arrow} alt="arrow to top" />
              </button>

              <button title="to right top" onClick={() => changeOrientation("to right top") }>
              <img src={arrow} alt="arrow to right top" className="transform rotate-45" />
              </button>

              <button title="to right" onClick={() => changeOrientation("to right") }>
              <img src={arrow} alt="arrow to right" className="transform rotate-90" />
              </button>

              <button title="to right bottom" onClick={() => changeOrientation("to right bottom") }>
              <img src={arrow} alt="arrow to right bottom" className="rotate-135" />
              </button>

              <button title="to bottom" onClick={() => changeOrientation("to bottom") }>
              <img src={arrow} alt="arrow to bottom" className="transform rotate-180" />
              </button>

              <button title="to bottom left" onClick={() => changeOrientation("to bottom left") }>
              <img src={arrow} alt="arrow to bottom left" className="rotate-225" />
              </button>

              <button title="to left" onClick={() => changeOrientation("to left") }>
              <img src={arrow} alt="arrow to left" className="transform -rotate-90" />
              </button>

              <button title="to left top" onClick={() => changeOrientation("to left top") }>
              <img src={arrow} alt="arrow to left top" className="transform rotate-180" />
              </button>

              <button onClick={() => changeOrientation("circle") }>
              <img src={radial} alt="radial" className="px-1.5" />
              </button>

          </div>
To make some of them rotate, add this CSS in App.css file.
.rotate-135 {
    transform: rotate(135deg);
}

.rotate-225 {
    transform: rotate(225deg);
}
button:focus{
    border: 2px solid white;
    border-radius:50%;
    outline: none;
    transition: all 220ms ease-in;
}
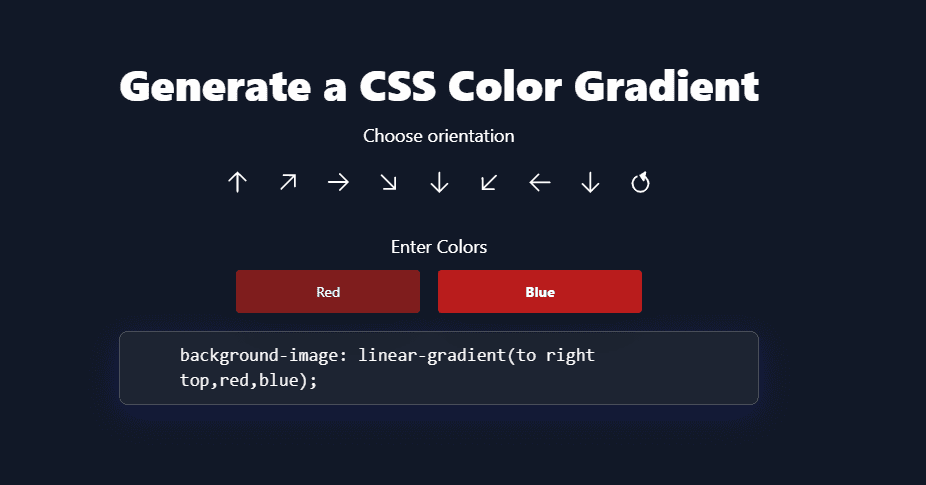
It should now look like this.
![[direction-controls.png]]
Let us now add 2 buttons to take the color inputs from the user and a little CSS code box below.
<h2 className="text-xl text-white text-center py-3 mt-5 italic font-cursive">Enter Colors & press Enter.</h2>
<div className="text-white text-center py-2 rounded mb-3  text-white w-40 mx-auto">
  <h2 className="bg-amber-700">{error}</h2>
</div>


<div className="flex items-center justify-center flex-wrap">
    <form className="flex gap-5 justify-center items-center flex-wrap">

        <input type="text"
             ref={hex}
             defaultValue={color1}
             style={icolor1}
             className="rounded px-2 py-3 text-center shadow-2xl font-bold bg-red-900"
             name="hex" />

        <input type="text"
             ref={hex2}
             defaultValue={color2}
             style={icolor2}
             className="rounded px-2 py-3 text-center shadow-2xl font-bold bg-red-700"
             name="hex2"/>

        <input
              type="submit"
              className="hidden"
              onClick={(e) => doJob(e)}
              />

      </form>
</div>

  <div className="box md:w-[640px] w-[350px] h-auto mx-auto break-all mt-4 p-2 ">
      <p className="p-3 text-gray-200 font-mono text-base md:text-xl text-center font-semibold">
          <span className="text-gray-100">background-image: </span> { cssCode }
      </p>
  </div>
.font-cursive {
font-family: cursive;
}
.box{
background: rgba( 255, 254, 254, 0.05 );
box-shadow: 0 8px 32px 0 rgba( 31, 38, 135, 0.37 );
backdrop-filter: blur( 9.5px );
-webkit-backdrop-filter: blur( 9.5px );
border-radius: 10px;
border: 1px solid rgba( 255, 255, 255, 0.18 );
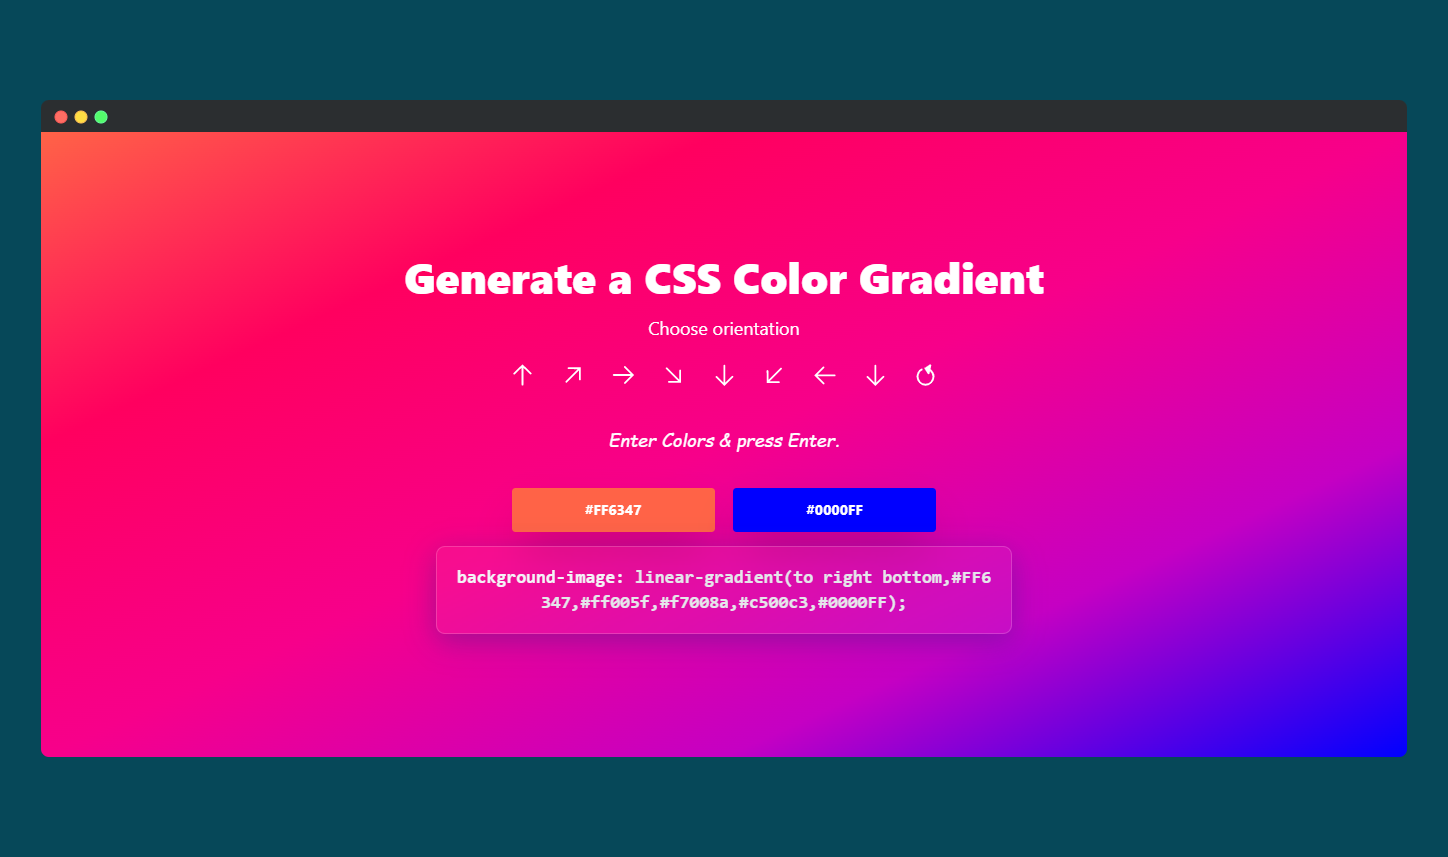
}It should look like this once add the markup and CSS. Now at this moment, we have finished building the basic layout for the app.

Add the Functionality
First of all we have to declare all the variables and refs for the colors and buttons. To use the state in the React Functional components, I will be using useState hook.
    const [color1, setColor1] = useState("#FF6347"); //input box one default color
    const [color2, setColor2] = useState("#0000FF"); //input box2 one default color

    //dynamically generated colors using chroma js
    const [generated1, setGenerated1] = useState("");
    const [generated2, setGenerated2] = useState("");
    const [generated3, setGenerated3] = useState("");

  //css controls
    const [direction, setDirection] = useState("linear-gradient");
    const [orientation, setOrientation] = useState("to right bottom");

    //errors var
    const [error, setError] = useState("")

  //color vars for dynamic color for the input text
    const [invertedcolor1, setinvertedColor1 ] = useState("")
    const [invertedcolor2, setinvertedColor2 ] = useState("")

    //refs to both the inputs
    const hex = useRef(color1);
    const hex2 = useRef(color2);

  //String style built for the div background to display the gradient color
  const ulStyle = { backgroundImage: direction + "("+orientation+","+color1 +","+generated1 +","+generated2 +","+generated3 +","+color2+")"}

  //string generated to copy by the user
    const cssCode = direction+ "("+orientation+","+color1 +","+generated1 +","+generated2 +","+generated3 +","+color2+");";
Now, when the arrow buttons are selected, the function changeOrientation is fired with direction string passed in like below.
<button title="to right" onClick={() => changeOrientation("to right") }>
              <img src={arrow} alt="arrow to right" className="transform rotate-90" />
</button>
To handle the function we will write below function.
    const changeOrientation = function (ori){

    //condition to check if the passed in string is circle
    //if circle the radial gradient is generated
    //else linear gradient

        if(ori === "circle"){
          //setting the direction variable & orientation
            setDirection("radial-gradient")
            setOrientation(ori)
        }else{
            setDirection("linear-gradient")
            setOrientation(ori)
        }

    }
Now, when the background color is anything we have to set the input box color to dark or bright based on the background color dynamically. As well we will have to generate 3 dynamic colors from the input of the user. To handle that we have below functions.
  //the background color and text color style for inputs
  const icolor1 = { background: color1, color:invertedcolor1 }
    const icolor2 = { background: color2, color:invertedcolor2 }

    function checkContrast(color){

                //checking the luminance of the color
                const contrast = chroma(color).luminance();

        //returning the color based on the luminance of the background
                if(contrast > 0.6){
                    return "#000"
                }else{
                    return "#fff"
                }
    }
Dynamic color generator function.
const generateColors = function () {
    //check if both the colors are valid colors
        if(chroma.valid(color1) && chroma.valid(color2)){

      //use the chroma-js scale feature to interpolate
      //between two color values and generate 3 more
      //dynamic colors including both input colors

            let word = chroma.scale([color1,color2])
                .mode('lch').colors(5);

      //set the generated colors.
      //Due to just 3 colors, I did not use loop.
            setGenerated1(word[1]);
            setGenerated2(word[2]);
            setGenerated3(word[3]);

      //At this moment, setting the text color of the input boxes
            setinvertedColor1(checkContrast(color1))
            setinvertedColor2(checkContrast(color2))

      //Setting the error to empty string
            setError("")

        }else{
          //if not set the error
            setError("Color are no valid.")
        }

    }
Now, whenever someone enters colors and press Enter button, then one function fire which is called doJob(e) where event is passed in the parameter.
    function doJob(e){
        //prevents default submission of the form
        e.preventDefault();
        //setting new values of the input colors
        //everything else changes on their own as the
        //values are reactive
        setColor1(hex.current.value);
        setColor2(hex2.current.value);

    }
  //use the hook instead of componentDidMount
    useEffect(() => {
      //generating colors on the mount
        generateColors();
    });
Run the app using yarn start or npm run start and you should see the output of the app at localhost:3000.


